 ← Pickerty Resource Center
Photos are the single biggest reason someone comes to your sale.
The Images step of setting up a sale. Drag your photos onto the box, or click it to browse your computer.
Photos are the one exception - they're saved as soon as they finish uploading, and reordering or deleting saves right away too.
The Save and Save and Continue buttons are still at the bottom, the same as every other step. Your photos are already safe without them — use Save and Continue when you're ready to move on to Publish.
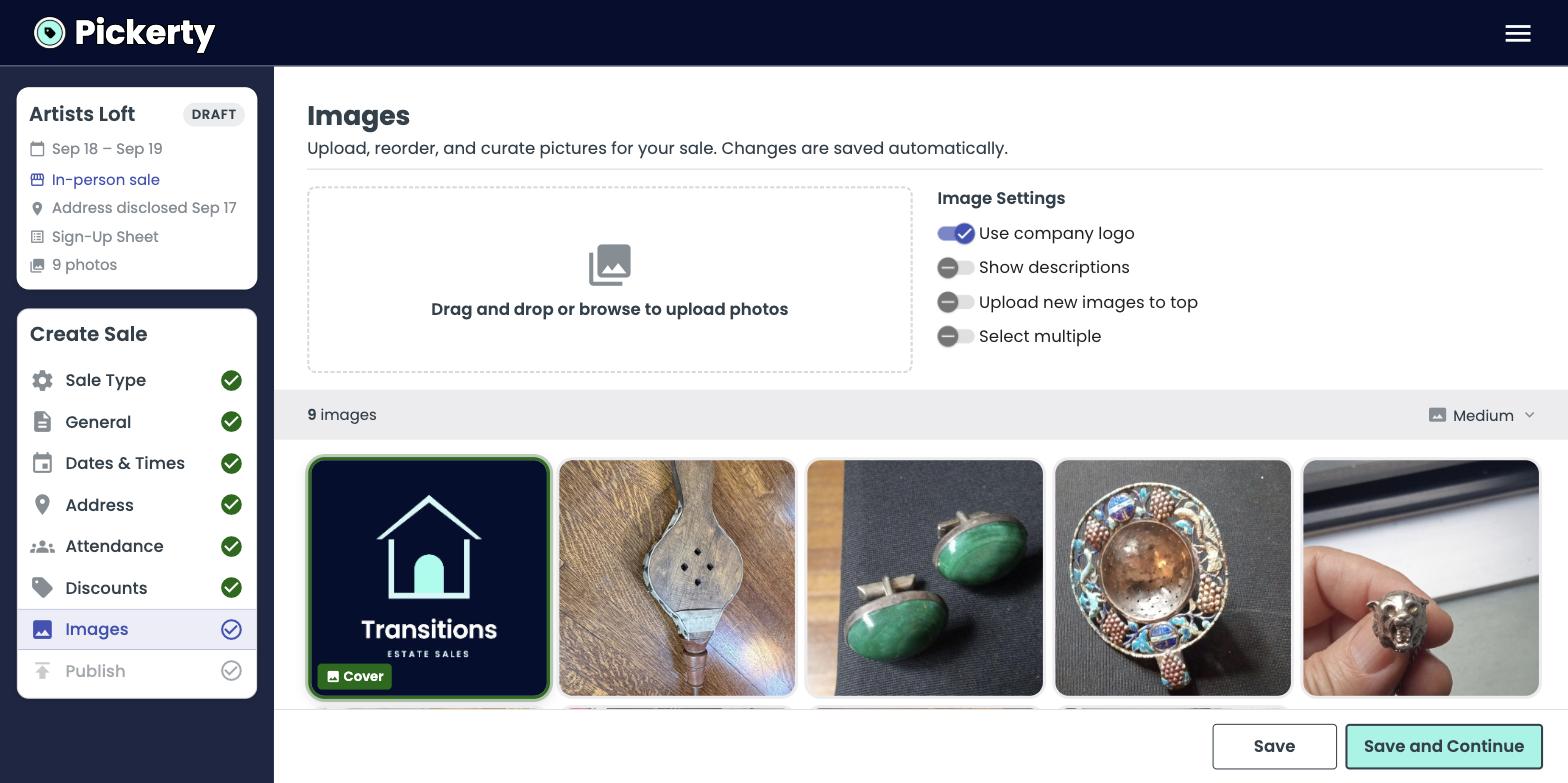
The first photo has a green Cover label. It's the first photo shown on your dashboard, the Pickerty homepage, and your sale page.
Make it your best single item — or use your company logo.
| Setting | What it does |
|---|---|
| Use company logo | Set's your logo as the first photo. Leave it on — your sale automatically has at least one picture and it's free advertising. |
| Show descriptions | Lets you type a caption under each photo. |
| Upload new images to top | New photos are uploaded to the front rather than the end. |
| Select multiple | Turn on to select several photos at once, then delete or move them together. |
Three tools decide what a shopper sees first, and they do different jobs:
The practical difference: featuring a photo promotes it without disturbing how you have grouped everything else — so you can keep your photos organized room by room and still put the walnut credenza and the good jewelry in front of it.
Featured photos are the ones Pickerty treats as your headline items, so it is worth flagging four or five genuinely good pictures rather than leaving it empty.
Every photo has its own set of tools — crop, rotate, flip, reorder, download, delete. They're tucked behind a button that only appears once you select at least one photo.
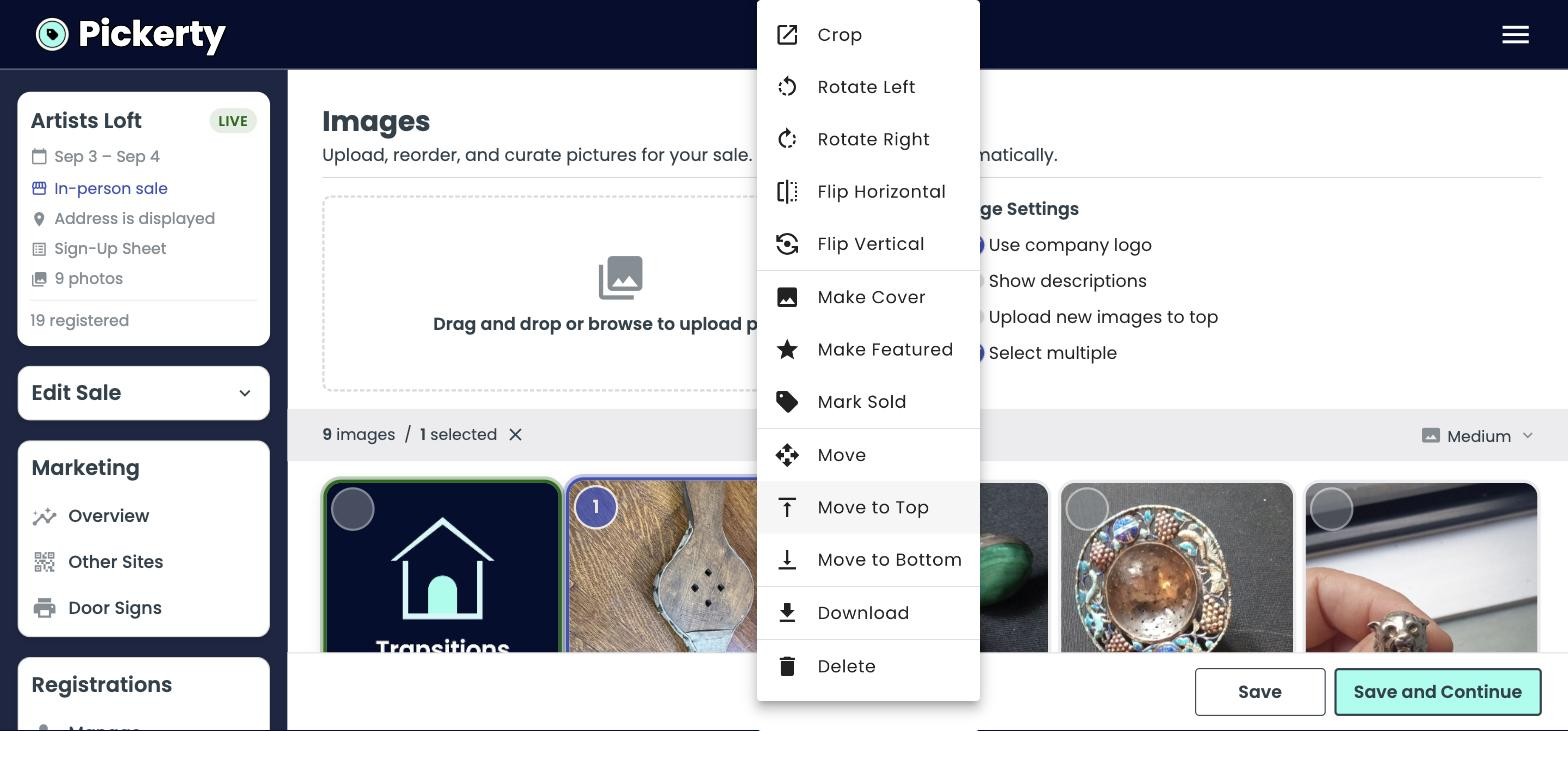
| Tool | What it does |
|---|---|
| Crop | Opens the photo so you can trim it. Drag the corners of the box to choose what to keep, then click Crop Image. See the note on shape below. |
| Rotate Left / Rotate Right | Turns the photo a quarter turn. Use it when a phone photo comes in sideways. |
| Flip Horizontal / Flip Vertical | Mirrors the photo. Rarely needed. |
| Make Cover | Makes this the cover photo — the one shoppers see first on your dashboard, on the Pickerty homepage, and at the top of your sale page. |
| Make Featured | Marks a photo as one of your best. Featured photos are shown first in the photo grid, wherever they actually sit in the running order. |
| Mark Sold | Puts a Sold badge on the photo and moves it to the bottom of the photo grid in the shoppers' view. Useful on a multi-day sale — mark the big pieces sold at the end of day one rather than deleting the photo, so your best remaining items rise to the top. |
| Move | Pick the photo up and drop it somewhere else in the running order. |
| Move to Top | Sends photos to the front of the running order. |
| Move to Bottom | Sends photos to the end. |
| Download | Saves a copy back to your computer. |
| Delete | Removes it from the sale. |
Photos taken on a phone often arrive rotated. Select the photo, click ···, then Rotate Right until it looks correct. It saves as soon as you click.
Leave Select multiple on and click the circle on several photos before opening the ··· menu. Whatever you pick — delete, move to top, rotate — applies to all of them together. This is the fast way to organize your photos so they shine.
Pickerty displays photos as squares by default, because they work well on almost every screen size and device type.
But some photos shouldn't be squared off. A wide shot of a full room. A long dress on a hanger. A row of books on a shelf. For those, change the shape instead of accepting the crop: in the Crop window, turn off Square Aspect Ratio (recommended) and drag the box to whatever shape actually suits the photo.
If cropping to a square would cut off the thing you're trying to show, turn the square option off. Otherwise leave it on — a grid of squares looks tidier to a shopper scrolling on a phone.
Dragging is much faster than the Move commands, and it's the way to move several photos at once.
Everything you're dragging drops in together, in the order it was in. There's no save to click.
Whatever ends up first is your cover photo. The quickest way to change it: drag your best photo to the very front, or select it and use ··· → Move to Top.